TL;DR
- I wanted to launch an application and offer it as SaaS
- I chose Kubernetes for its scalability, but I didn’t want to deal with its complexities
- My goal was to launch my service as fast as possible and operationalize it quickly without letting infrastructure-related complexities get in the way.
Background
I love what we are building here at Shipa, and I couldn’t be more proud of all the great things the team is constantly delivering, but one thing I like is having personal projects. These help me keep up to date with technology and learn new things.
I try to keep the investment in those projects at a minimum and under control. That goes across both the timing and the resources invested.
My most recent project is related to the experience when defining cloud-native applications. I see so many DevOps teams spending time having to create and manage templates for developers to deploy their applications. In my opinion, this:
- Creates toil for the DevOps team.
- Slows down the onboarding of new applications.
- Shift left won’t effectively happen because creating infrastructure-level definitions is often complex for developers and diverts time from where they add value.
- Too many duplicated charts because there is no practical way to share application definitions with other teammates or teams.
The list goes on, so I decided to put together a product that people could use to:
- Build their application definition without dealing with any underlying Kubernetes complexity
- Save it and share it with their teammates or publicly
- Export that application design to be used with different IaC tools or pipelines
Application Architecture
The application is initially simple, and I have broken it down into different components:
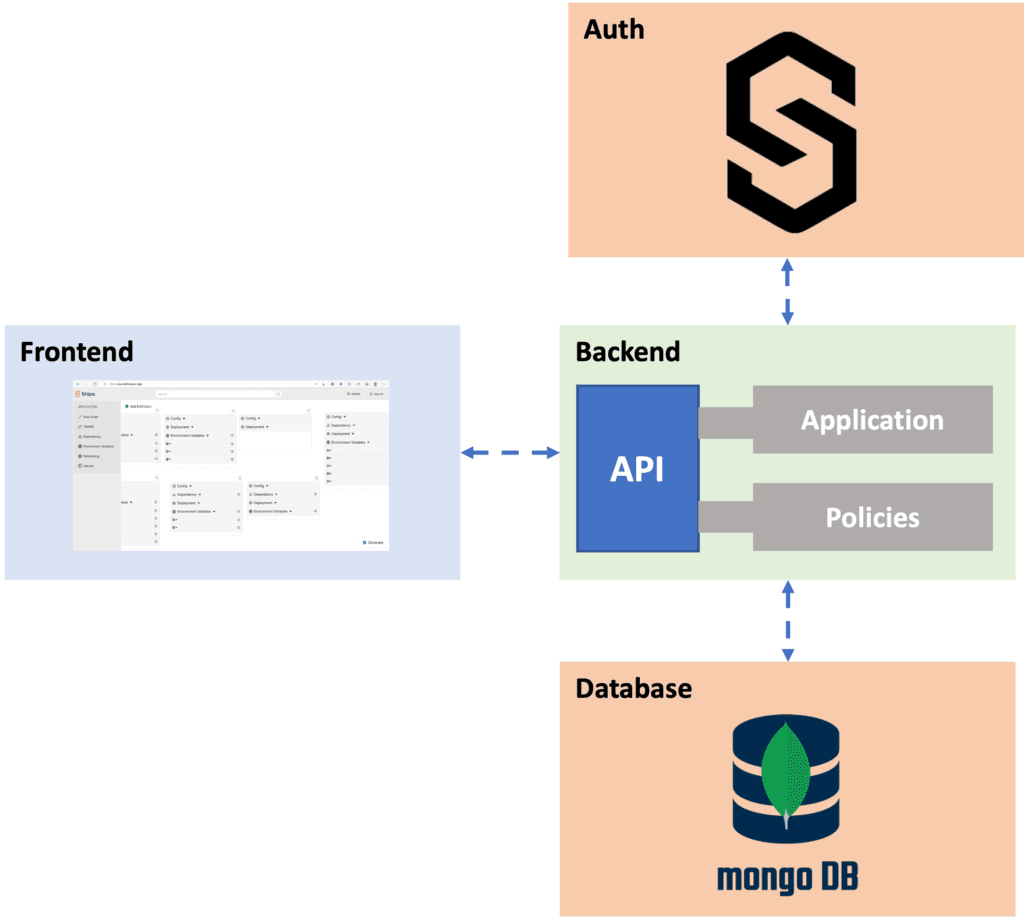
Description:
- Frontend: A React application with a drag and drop interface. The interface allows users to define applications and policies using a drag and drop experience. In addition, users can save, share, and search for saved definitions in a global repository.
- Backend: A Golang service exposed through an API. Calls are received from the frontend service and, based on the payload, generate the application or policy definition based on the provider selected. The Backend service also manages the saving and sharing of definitions.
- Database: I chose MongoDB to store and serve the necessary data because I wanted to learn MongoDB (one of the advantages of personal projects!)
- Auth: I’m using Shipa to serve the authentication. As long as users have a Shipa account, they can log in to save and share their definitions.
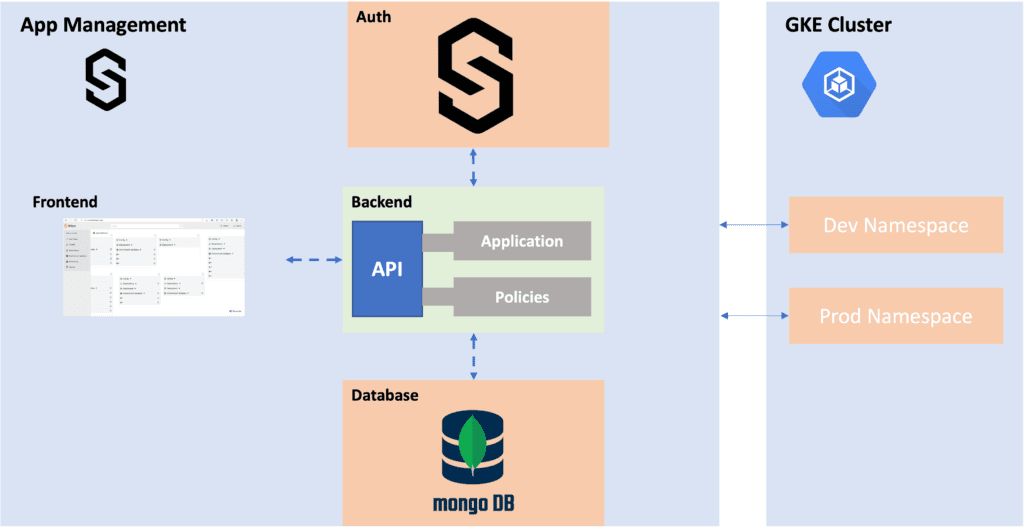
Hosting My Application
I wanted a scalable infrastructure to host my application and its different services, so I chose Google Kubernetes Engine (GKE).
While spinning up a GKE cluster is effortless, deploying multiple services, exposing them to external users, securing them, and monitoring them can be daunting. As mentioned before, I aim to launch as quickly as possible and spend the least amount of time dealing with infrastructure.
I will also need to:
- Configure network policies so my backend API only accepts requests from the frontend service
- Set up monitoring, so I can quickly identify potential issues and security violations
- Integrate activities and events into Slack, so I can know quickly if something happens.
- Set up dev and a production environment, so people see less of the bugs I introduce 🙂
Setting up all the above directly with Kubernetes would be time-consuming because I would be dealing with ingress controllers, deployment definitions, setting up Prometheus, exposing services, complex network policies using Calico, certificate generation, and more.
I would be spending time on infrastructure rather than on my application, releasing it, getting feedback, pushing fixes, and monitoring utilization. That’s less than ideal.
To remove that, I decided to use Shipa to host my application, which means I’m my own customer!
Deploying My Application
GKE Cluster
I already have a Google Cloud account and gcloud configured on my terminal, so creating a cluster is straightforward. Here is a sample command you can use:
gcloud beta container --project "project-name" clusters create "appcluster" --zone "us-west1-a" --no-enable-basic-auth --cluster-version "1.22.8-gke.201" --release-channel "regular" --machine-type "e2-standard-2" --image-type "COS_CONTAINERD" --disk-type "pd-standard" --disk-size "100" --metadata disable-legacy-endpoints=true --scopes "https://www.googleapis.com/auth/devstorage.read_only","https://www.googleapis.com/auth/logging.write","https://www.googleapis.com/auth/monitoring","https://www.googleapis.com/auth/servicecontrol","https://www.googleapis.com/auth/service.management.readonly","https://www.googleapis.com/auth/trace.append" --max-pods-per-node "110" --num-nodes "3" --logging=SYSTEM,WORKLOAD --monitoring=SYSTEM --enable-ip-alias --network "projects/project-name/global/networks/default" --subnetwork "projects/project-name/regions/us-east1/subnetworks/default" --no-enable-intra-node-visibility --default-max-pods-per-node "110" --enable-network-policy --no-enable-master-authorized-networks --addons HorizontalPodAutoscaling,HttpLoadBalancing,GcePersistentDiskCsiDriver --enable-autoupgrade --enable-autorepair --max-surge-upgrade 1 --max-unavailable-upgrade 0 --enable-shielded-nodes --node-locations "us-west1-a"The command above will create a cluster with 3 nodes with 2 vCPU and 8GB of memory each. The command also enables network policy for the cluster.
If you copy the code above, make sure you change it to use your project name.
Once the cluster is running, you can use the command below to configure kubectl:
gcloud container clusters get-credentials cluster-name --zone us-west1-a --project project-nameConnecting Shipa
With my cluster running and my Kubectl configured. It’s now time to connect it to Shipa.
I already have my Shipa Cloud account, but if you don’t have one yet, you can sign up for free here.
Because I used Shipa as my application management platform, I don’t need to worry about installing ingress, Prometheus, RBAC, and more. Once you connect Shipa to the cluster, those will be taken care of automatically.
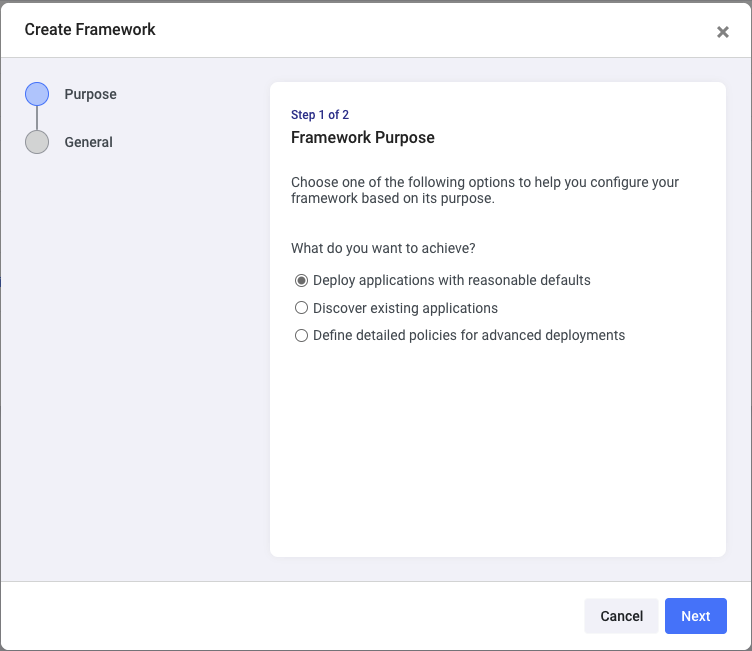
Creating my framework
Shipa uses the concept of Policy Frameworks to connect to your cluster, so head over to Frameworks to create the first one and click on Create.
To keep the initial setup simple, keep the default setting of “Deploy applications with reasonable defaults” and click Next.
Enter the framework name, select the available Plan, and the pre-created team shipa-team. Click on Create
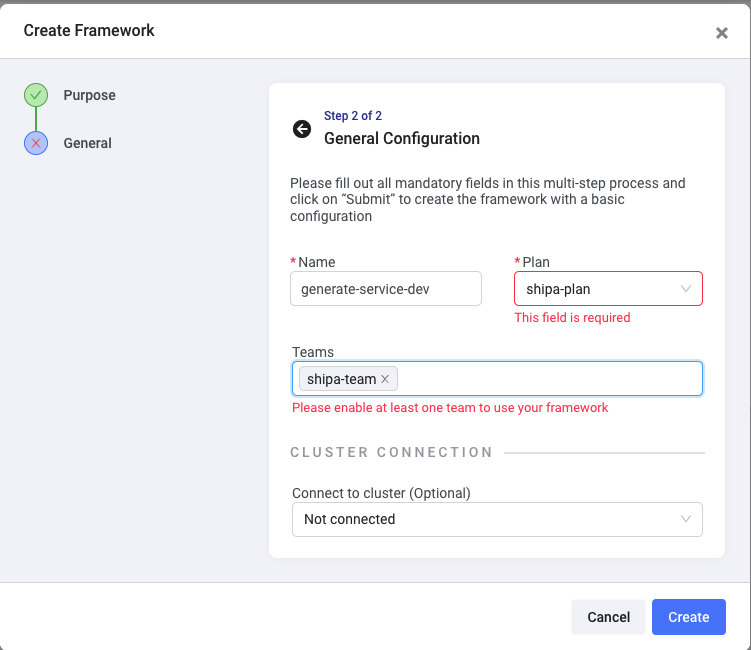
You can customize these settings by creating a new resource limit plan or adding more teams and users to your account. I’m the only one managing this project, so the default options work for me.
Shipa automatically creates a namespace for each framework you connect to a cluster, so when I deploy my application, Shipa will use the namespace based on the policy framework I select.
Connecting to my cluster
With your framework created, click on Clusters and then Create.
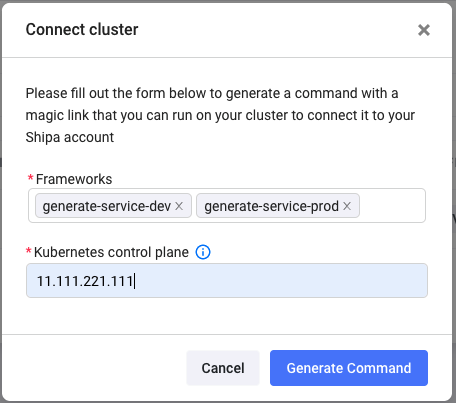
Here I selected the frameworks I created and entered my Kubernetes control plane address. Click on Generate Command.

Shipa generated a kubectl command. Once I ran it on my terminal, Shipa installed an agent in my cluster, created the namespace for each framework, and started showing up on my Shipa dashboard.
Deploying MongoDB
Connecting my cluster to Shipa only took me a couple of minutes and saved me an enormous amount of time because I didn’t need to deal with ingress install, config, Prometheus, RBAC, and more.
I clicked on Applications and then Create to deploy the first service.
I deployed my MongoDB service first, and it was pretty easy
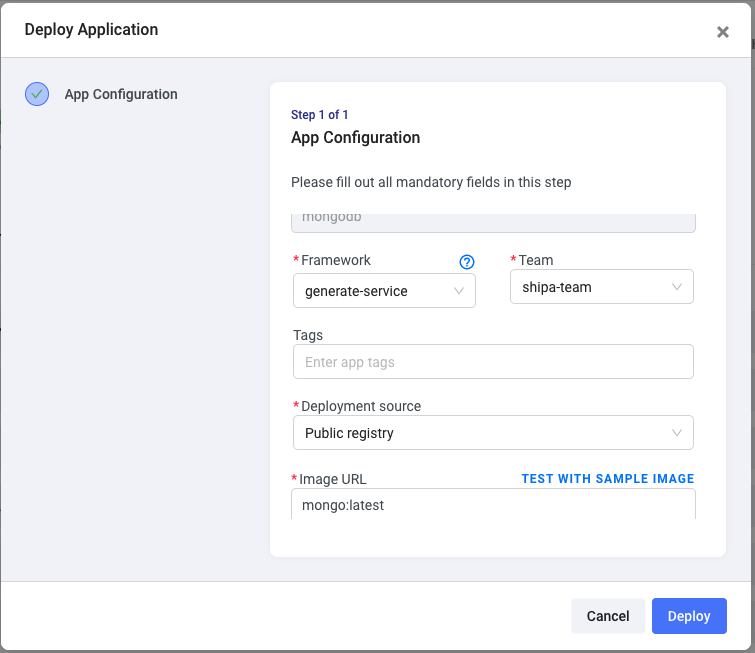
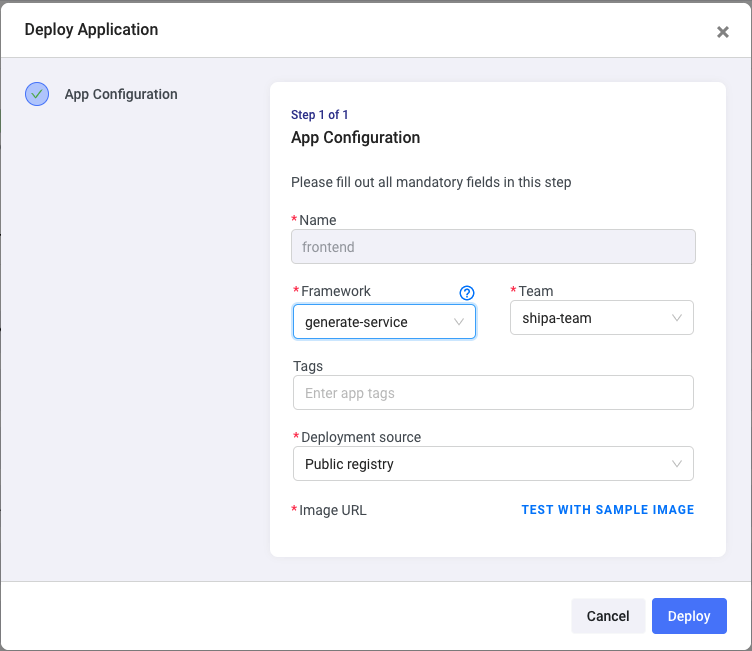
I entered the application name, the MongoDB image URL (mongo:latest), and picked the framework I wanted to use to deploy my application.
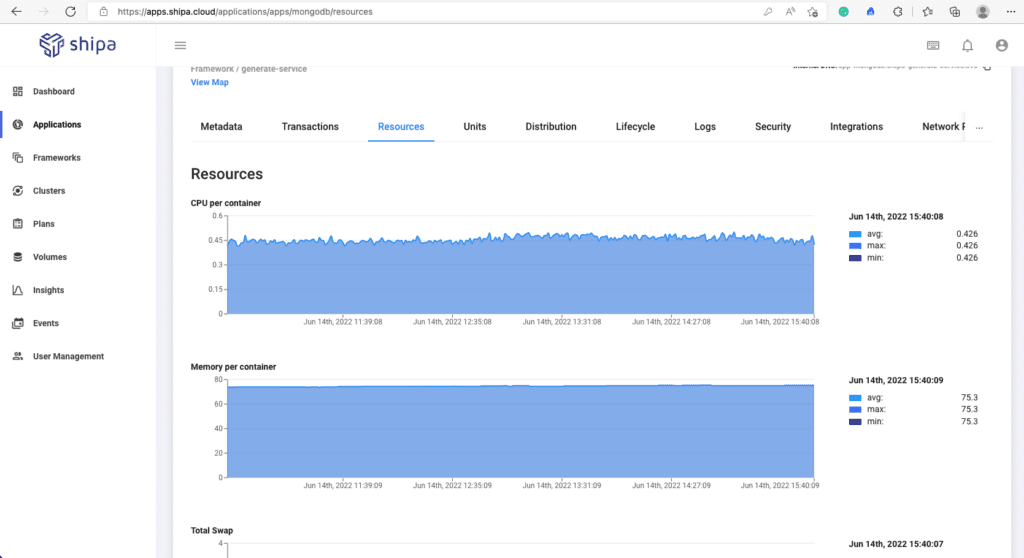
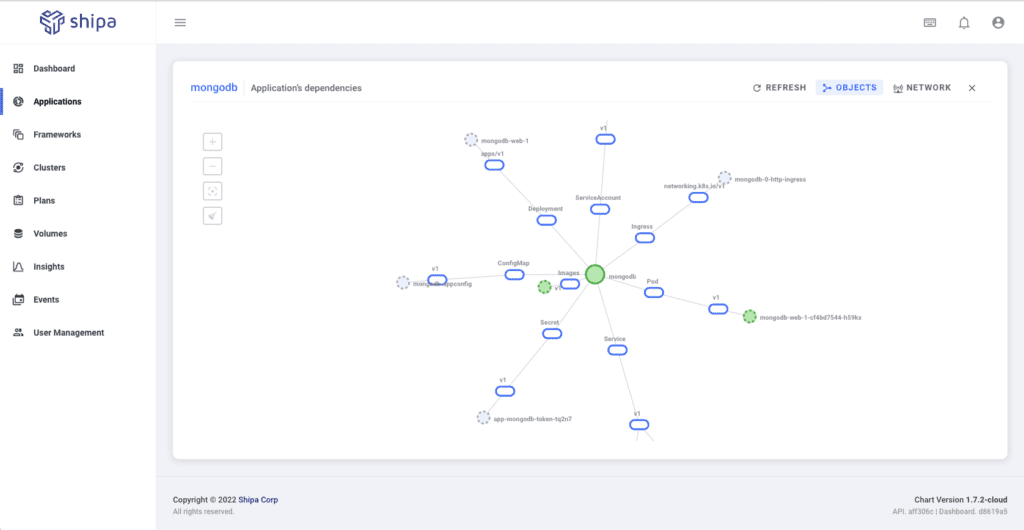
The deployment only took a few seconds, and I got some great info immediately, such as logs and the Internal DNS my other services can use to communicate with MongoDB, all without having to kubectl my way to configure things.
I also got the complete Metadata of my MongoDB application, some initial monitoring information, and the dependency map of my deployment:
Deploying the Backend
I clicked again on Applications and Create.
Like before, I entered my application name (backend), the image URL, and picked a framework. Now, I need to enter an environment variable so my backend application can connect to my MongoDB service.
I had to select the “Set environment variables” option in the deployment screen and hit Next.
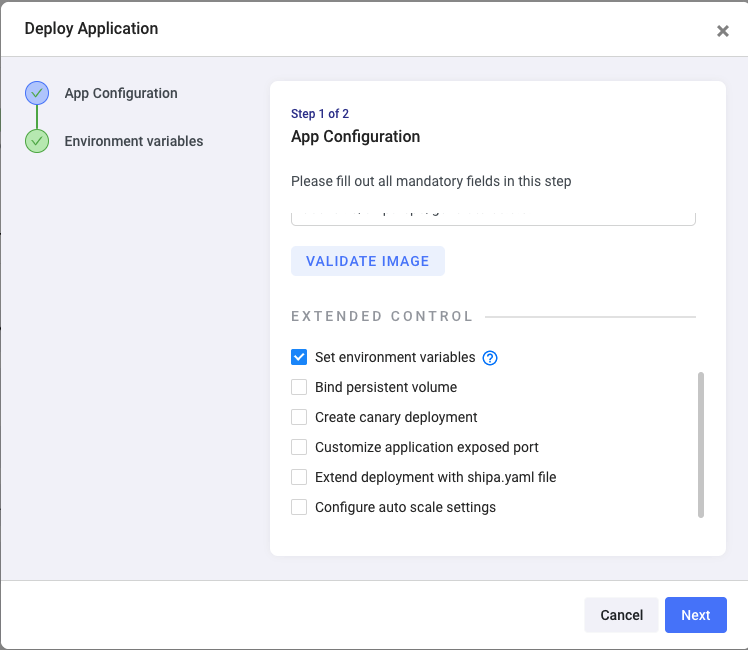
I created 2 env variables and entered the values for each. Once done, I clicked on Deploy
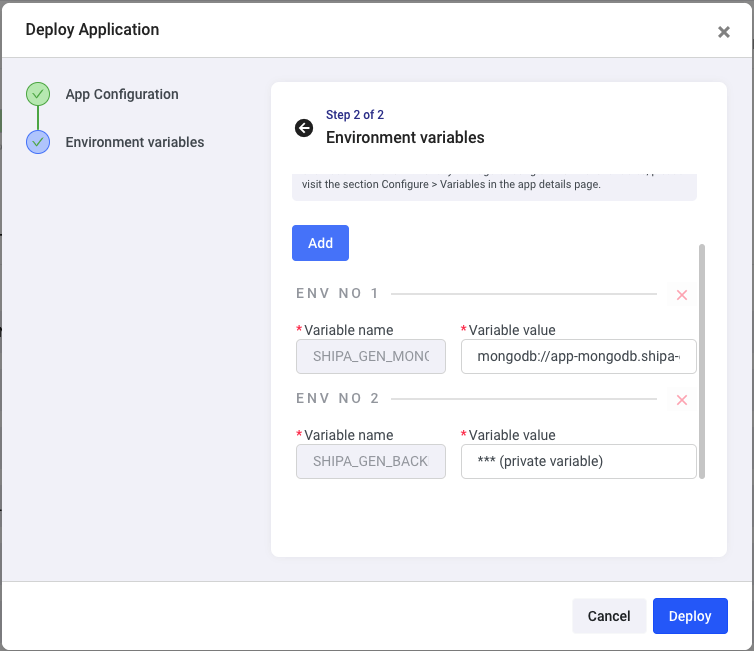
Since Shipa gives me the MongoDB service Internal DNS, it was just a couple of clicks to copy the address and paste it here as a value for one of my variables!
In the same way as before, I get all the necessary information about my application.
So lets now head to the last service
Deploying the Frontend
I clicked on Applications and followed the same process as the steps before for my frontend application:
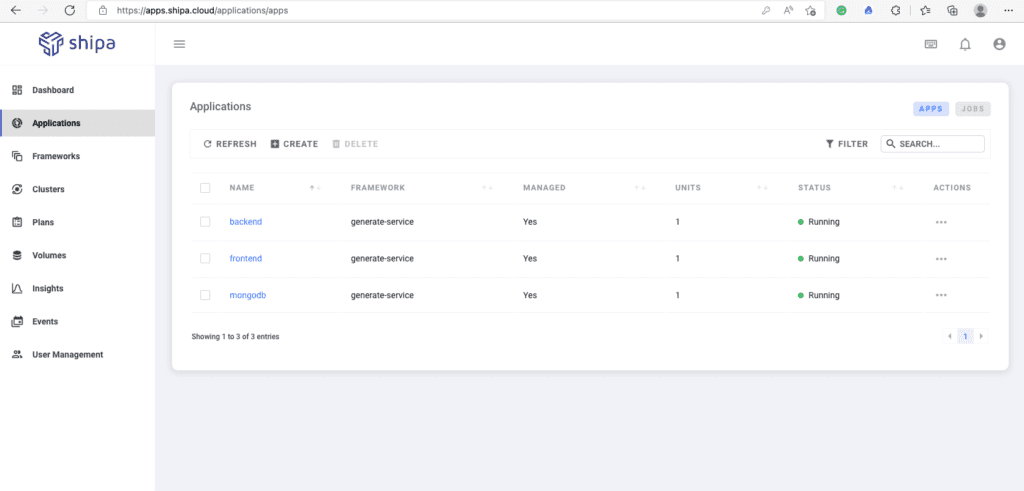
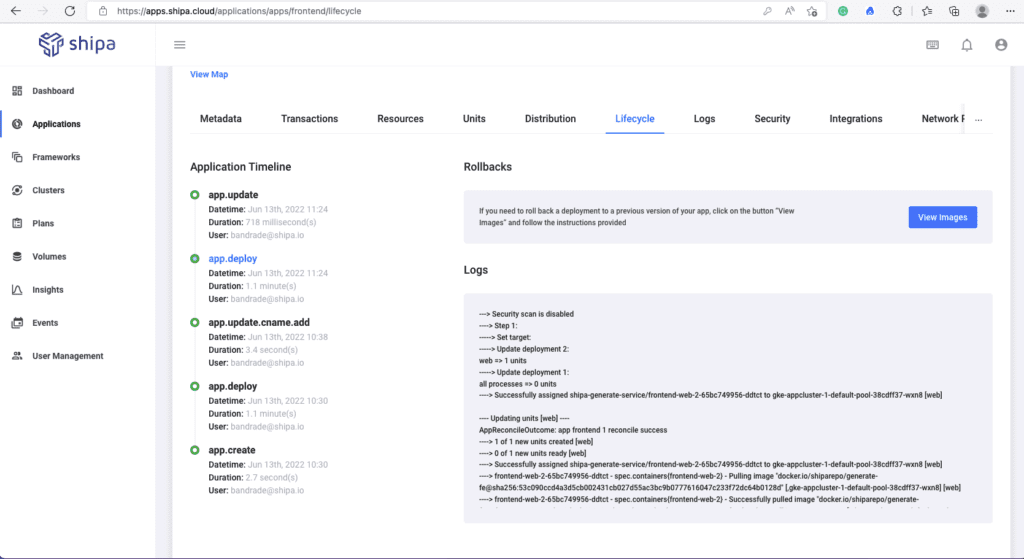
Now all my three services are running:
Exposing My Application
Even though Shipa creates an external URL you can give to users to access your application, that was not what I had in mind to provide my users with.
I then created a Domain using Google called defineyour.app and added a CNAME for my application called you.defineyour.app
Connecting this to my frontend application was easy. On the Applications page, I clicked on my frontend service, Configure, and CNAME.
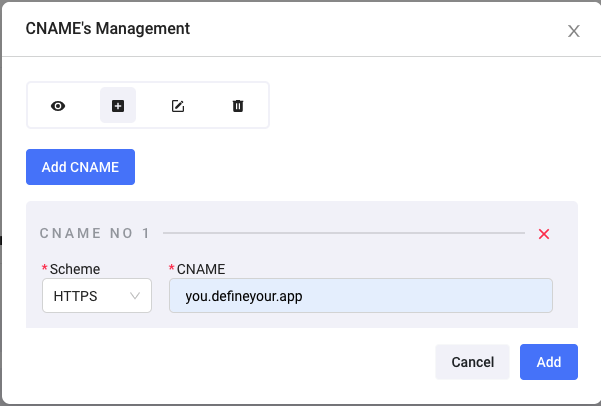
All I had to do was select HTTPS and enter the CNAME I created on Google Domains. Shipa automatically generated the certificate and added that endpoint to my frontend service.
In just a few minutes, the CNAME was propagated, and I could access my application through that CNAME. All without dealing with cert-manager, certificate generation, and more, which is usually a pain.
Setting Up Alerts
I wanted to quickly set up alerts for my services so if anything goes wrong, I can act fast.
I could create an alert by clicking on the service name and selecting the Integrations tab.
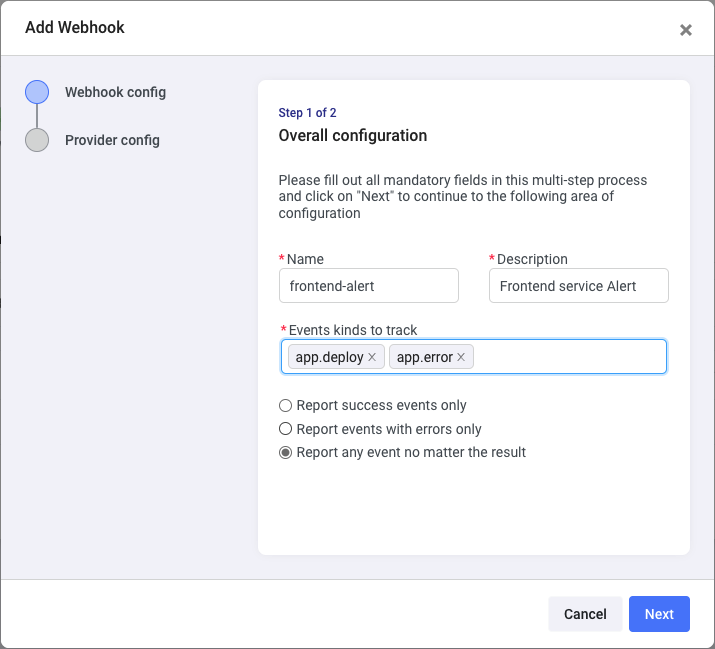
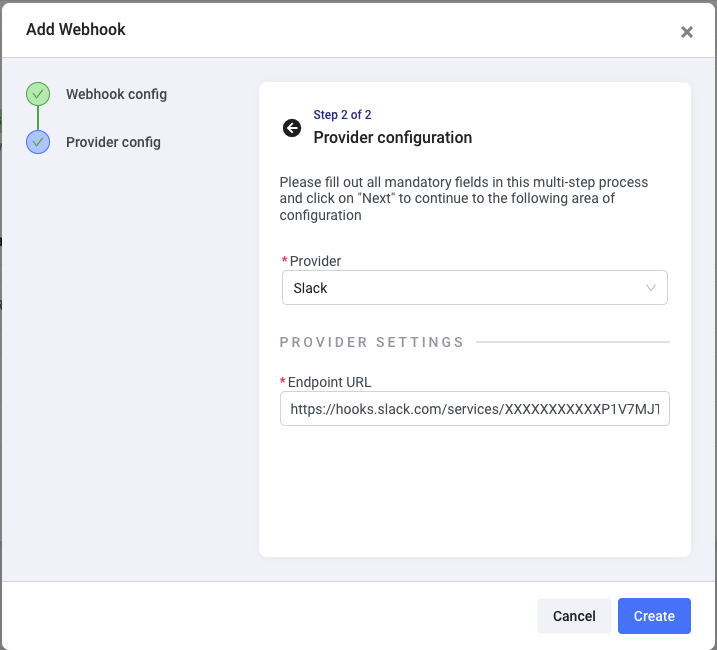
I selected Slack as a provider, but if whatever you use is not on the Provider list, you can use Shipa’s CLI to create a webhook for your incident tool. Here is an excellent example of how to create a webhook to Microsoft Teams.
Releasing my Service
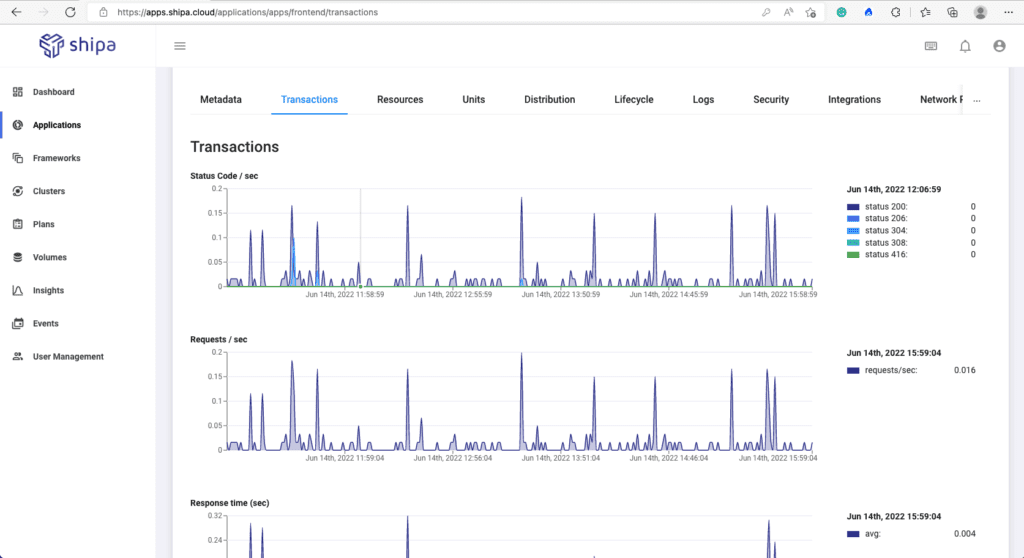
With my services running, the frontend is accessible through a custom CNAME, and I have my alerts in place, it was time to give people the address of my app so that they could give it a try.
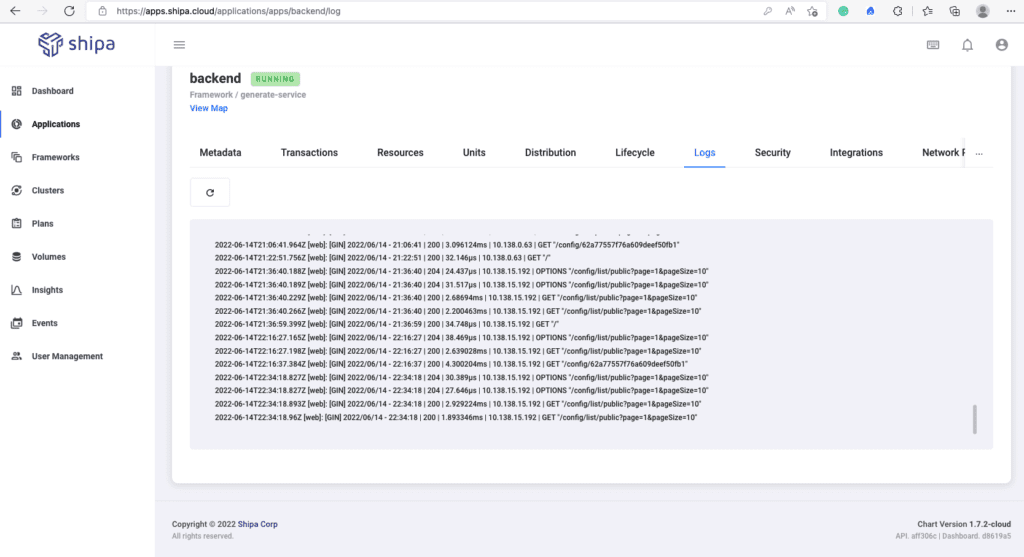
As people access my services, I can see how the app performs, logs, history, and more. Again, all without dealing with Kubernetes complexity and focusing all the time I have on my applications
Moving Forward
The next step for me now is to set the Network Policies, which I can do through Shipa, and integrate this into a pipeline, which I will probably use GitHub Actions
Conclusion
I went from having a few container images to launching a complete service as SaaS in just a few minutes without dealing with underlying infrastructure complexities. It was amazing to see how far Shipa has come as a product and how awesome of a product the team is delivering.
As we enter a weird period in the market and companies focus on doing more with less, enabling application teams to deliver faster, manage applications better, and keep those applications secure without complexities will make you an essential resource in your organization and being my own customer, has proven to me again that this is a much easier and better way to do it.